A Fun twist on the French

Hi all! How's everyone doin'? Time for more polish talk. I'm gonna share with you guys a little technique of my own. It starts out as a simple French Manicure, but it easily turns into some thing way cooler looking!


I'm gonna show ya two sets, five colors each, for a grand total of 10 different colors! The first set is a bunch of bright, eye-catching colors, perfect for summer. The second set is a group of metallic, elegant colors.

The only extra tool you need for this is sponge, and it doesn't even have to be big. When I do this I use a regular old kitchen sponge, I've never tried it with a makeup sponge, so I don't know how well it'll work.

Anyway, this is very simple. You start with your base color, then you French the tip with white. Make sure that you have quite a bit of white dribbled on otherwise you won't get the right look. And even if your nails aren't long, it works best with a thicker French. It doesn't matter if you don't have a steady enough hand to make a perfect tip, the next step fixes it...or destroys it...it depends on how ya wanna look at it. ☺


WORK QUICKLY! The next step is to take your sponge and drag the bottom part of the French down across the nail, leaving a little bit of the tip still in tact at the top. It may take a few swipes to get the look you want to achieve.


When you have done that your new French design is complete! Now, that wasn't so hard, was it?!? Remember to top coat for long lasting wear!

Ha-Be-Dee-Ha-Be-Dee-Ha-Be-Dee-That's-All-Folks! (Please lemme know what you think!) And I apologize for the poor quality of the pix. It really shows up if you give it a try!

(Set 1)


(Set 2)


Color Changing Nail Polish

Summer is a time for fun in the sun, so why shouldn't your nail polish have some sun-fun too? I've only found ONE polish that actually lived up to it's name of color changing. It's called DEL SOL.

I'm showing you RUBY SLIPPER. It starts out as a shimmery silver then it turns bright red when you put it in the sun. It's sooooooo cool! Be warned thought that it is very sheer, even with three coats. The more coats, the darker the red turns!


Another reason this polish is so cool is because it works as a great sparkle top coat over a white polish, or it adds a little bit of pretty silver sparkle to a dull silver...that is, until you get into the sun.

I like to use a silver glitter underneath it, because when I go outside it turns the silver into red! I really like watching it change colors!

My favorite color to use underneath the RUBY SLIPPER is Zoya's Luna.


It's a silver glitter, but it has a white base to it. I love Zoya because the polish goes on so nice and smooth and they have colors like no one else.

The Del Sol looks really pretty over the LUNA, it adds such a small amount of silver sparkle that it's hardly noticable. Then you go into the sun...and the RUBY SLIPPER goes to work! It's almost unbelievable to see the polish change colors.


I bought my RUBY SLIPPER off of Amazon a coupla months ago on a whim. I'll give ya the link so that you guys don't have to go through all the trouble of trying to find it.

http://www.amazon.com/Del-Sol-Changing-Polish-Electrik/dp/B0039KXLRC/ref=sr_1_1?ie=UTF8&qid=1309243366&sr=8-1">

They have a ton of colors, and I'd put my money on the fact that they all work as nicely as RUBY SLIPPER. But give that page a look over and let me know if you order any, and what you think of them! PEACE, LOVE AND NAIL POLISH! I'm out!~

National Dog Party Mural and 3-D Dogs

Hello again! I don't have anything really tonight, except the fact that the 24th was National Dog Party Day (a day we were really looking foward to celebrating!) We have a coupla dogs, 2 Cavalier King Charles Spaniels, 1 Biewer Yorkie, and 1 German Shepard. They all got spoiled today with treats and extra tummy rubs! ♥


To celebrate this fun-tastical day, I made a special set of nails. The right hand is a mural of one of our Cavalier's, Marlon Brando. I just love him to bits and pieces 'cause he's so adorable!

The left hand is a bit of acrylic work. I had a little trouble with the hats, but all-in-all I don't think it's a bad job. My little brother asked what kind of dogs I had been trying to make, and he seemed kinda disappointed when I told him I wasn't really trying to make breeds. I was just makin' partyin' dogs!

That's all I got for you tonight, except some really cute pictures of the pooches that my mom took. Here are Marlon Brando, Humphrey Bogart, and James Cagney. respectively!


Serena Williams English Open Grand Slam By OPI

Hey guys! I was so excited when my new Grand Slam colors came in the mail today and I just couldn't wait to share them with you!


The new colors, introduced for the English Open at the beginning of June, are Grape...Set...Match (metallic purple) and Your Royal Shine-ness (Shimmery Silver). Both of these colors come with Servin' Up Sparkle, which is a glitter top coat. No shatters *tears*...OPI made up for the missing shatters in the other colors though!

Grape...Set...Match is a purple with blue and pink shimmers in it. It looks metallic and it's really pretty. With just two coats I got great coverage! It's super-duper pretty without Servin' Up Sparkle over the top.


The second color is Your Royal Shine-ness. It's a silver that looks like you just dipped your nails in a pot of molten silver. It went on a little thick, but then again, it had just come out of a 100 degree mailbox! Both the colors are really super glam...and, again, that's without the Servin' Up Sparkle!


Then, it comes! The beyond words top-coat-to-end-all-top-coats, Servin' Up Sparkle. It really lives up to it's name! It catches the light and reflects all the colors of the rainbow! And I have to honestly say that it is without doubt the best glitter top coats I ever used, partially because the big glitters actually come out of the bottle on the brush! I'm excited that I don't have to pull them out with an orange stick! And as another positive, it doesn't get rough and bumpy to the point of driving you to insanity...or at least chipping it off...it's very smooth, for a glitter! And it looks AMAZING over the Grape...Set...Match! I don't like it as much over Your Royal Shine-ness, but it is still pretty!


I certainly hope that Serena Williams continues to work with OPI because I really LOVE the colors! What do you guys think of them?

New Revlon and Sinful Colors Blue

First off, I gotta apologize for not being on in a few days. I had a whole tutorial typed out and then...the computer crashed. I tried for five hours to fix it, and at 4 a.m., I finally gave up and went to bed. I haven't really felt like being on the computer because of that. So thanks for being patient!
While I was doing absolutely nothing, I picked up two new colors at the store. One of them is a new scented polish from Revlon and the other is a Sinful Colors color from the 4th of July collection.

The first I wanna talk about is the Revlon, mainly cause it has some...quirks. It's called MINT FIZZ, and like I said, it's from the new Scented Parfumé collection. It's a blue, glittery color and we couldn't wait to try it. One of the first things my mom and I noticed was the fact that it went on goopy, it was very strange. It wasn't like it was drying out, it just went on very gloppy. It also gave us lousy coverage. It took three thick coats for it to really show up. However, it did smell very strongly of mint. A little shocker here. When my mom and I looked at it after she had had it on for a day, it actually looked prettier than when it first went on! You just have to remember to put a top coat over it because it chips and peels very easily. You have to put a base coat under it too because it stains your nails blue without it...lazy me. Little point of historical intrest--Did you know that scented nail polish began in the 1930's? However, it was soon discontinued because people began sniffing more than was good for them. It's only recently made a bold reappearance through Revlon.


The second color is Sinful Color's CIAO BELLA and it's from their collection for the 4th of July. It's a deep blue (yep, I was in a blue mood when I went shopping). It also has a good amout of sparkle to it, too. I really like Sinful Colors, they are really cheap and they always go on nicely. CIAO BELLA is no exception. I really LOVE this color! It's perfect for Independence Day. It's got that US of A look to it. Perfect for flags! And it went on great. I got perfect coverage with just two coats!


That's all I've got for you guys now! Talk to ya soon! TTFN!

Some Like It Hot: Easy Flames Nail Art


The summer months always bring heat, so why shouldn't your nails be as hot as the weather?!? This is a twist on a plain old french mani that is sure to get second looks and "Oh my Goodness! Where did you get those done?!" Get ready, this easy nail art is as hot as it gets!

I started with two different colors for my base, just to show you what the flames look like on different colors. I used OPI's My Private Jet and Wet n Wild's Kaleidoscope. I know that I was supposed to put away all of my darker colors until fall, but I just love My Private Jet. It's a black color, but it is incredibly irredecent! It's one of my favorite colors! The other color, Kaleidoscope, is actually meant to go over a color to give it extra glitter, but three coats and your nails have a great eyecatching sparkle, even without a base color! (you'll find that I break a lot of rules, like not using base color when I'm supposed too! ☺)


So, now to start the nail art you have to have completely dried nails. Despite their show-stopping appearance, flames are a pretty easy thing to master painting. As a matter of fact, I use them all the time, especially when I make nails inspired by Rock-N-Roll groups (like KISS). I usually use a small nail art brush, or my brush with one bristle, this way the paint is easier to control. I've also found that RIMMEL French White Tip Pro, it comes with a tiny brush, works great too. (It's what I used for this mani). You always start with a white base for the flames. This is especially important on a black or dark colored base to help the flames show up! The trick is to use a small brush and a flicking motion when making the tips of the flames. You simply paint up to where you want your flame to end, then you use a small 'flick' of your wrist to make the extremely point at the tip. Make big flames and small flames and branch littl flames off bigger ones. I love the fact that nail art has no rights or wrongs and that no one's is ever the same! After you have the white base on, you have to wait for it to dry, otherwise your flames will NEVER dry and they'll be ruined within the hour.


After the white has dried, it's time to start adding the color. I use red, orange, and yellow, in order to make them look like real flames. Today, I'm using Revlon All Fired Up (Red), Heaven Nail Lacquer SERENITY (Orange), and Sinful Colors Neon Melon (Yellow). The trick to this is to apply the red first, using your small brush, then add a tiny bit of orange. Carefully swirl some of the orange into the red and drag the new color up towards the tips of you flames.


You then do the same for the orange and yellow.


Be sure to finish the tip with the brightest yellow possible! After you've done that, top coat it, and you are ready to hit the pool, or the mall, or...where ever! No matter where you go, you can hold your head up, knowing the you have great looking nails that you did yourself!

Just to show you an example of how else you can use flames...

OPI Prirates of the Carribean & Grand Slam

One of my absolute fave nail art looks is OPI's Shatter Collection. Each polish gives you spectacular results everytime. They can give you every look from hard rockin' chick to sleek elegant madame. AND IT'S TOTALLY FOOL PROOF!!!!!!!!!!!!
Today I've got two different collections that I'm gonna look at, The Pirates of the Carribean with Silver Shatter, and Serena Williams Grand Slam with Red and White Shatter.


When the Pirates of the Carribean Collection came out, I was possibly the first with my credit card out and ready to swipe. I was extremely excited, not just because of my love for anything that is related to Johnny Depp, but because of the new Shatter. My mom and I waited for what seemed like forever before the polish finally arrived. At first, we were a tad disappointed because it shattered very little. It wasn't until a few days later that I realized you cannot goop it on, which was what we were doing in all our excitement. Instead, you have to brush it on lightly. After we figured that out, it was smooth sailing. (No POTC pun intended ☺) The rest of the collection includes: Sparrow Me The Drama (Dark Pink), Steady As She Rose (Pale Pink), Planks A Lot (Purple), Stranger Tides (Muddy Green), Skull & Glossbones (Off-White), and Mermaids Tears (Green). They all go on very nicely and they are all pretty. I think my Faves are Sparrow Me The Drama and Mermaids Tears. Just a reminder, DO NOT GOOP!!!! Lightly brush. AND, as always, TOP COAT!!!!!


The second collection I really love is the Serena Williams Grand Slam. These colors come with different shades of Shatter: Black, Red, and White. As a matter of fact, the Black Shatter that was released with Simply Smashing was the first ever and I fell in love with it instantly! The great thing about it is no matter how much you slop on it shatters like a charm, it's not temperamental like the Silver. If you don't have it already you should look into purchasing it!


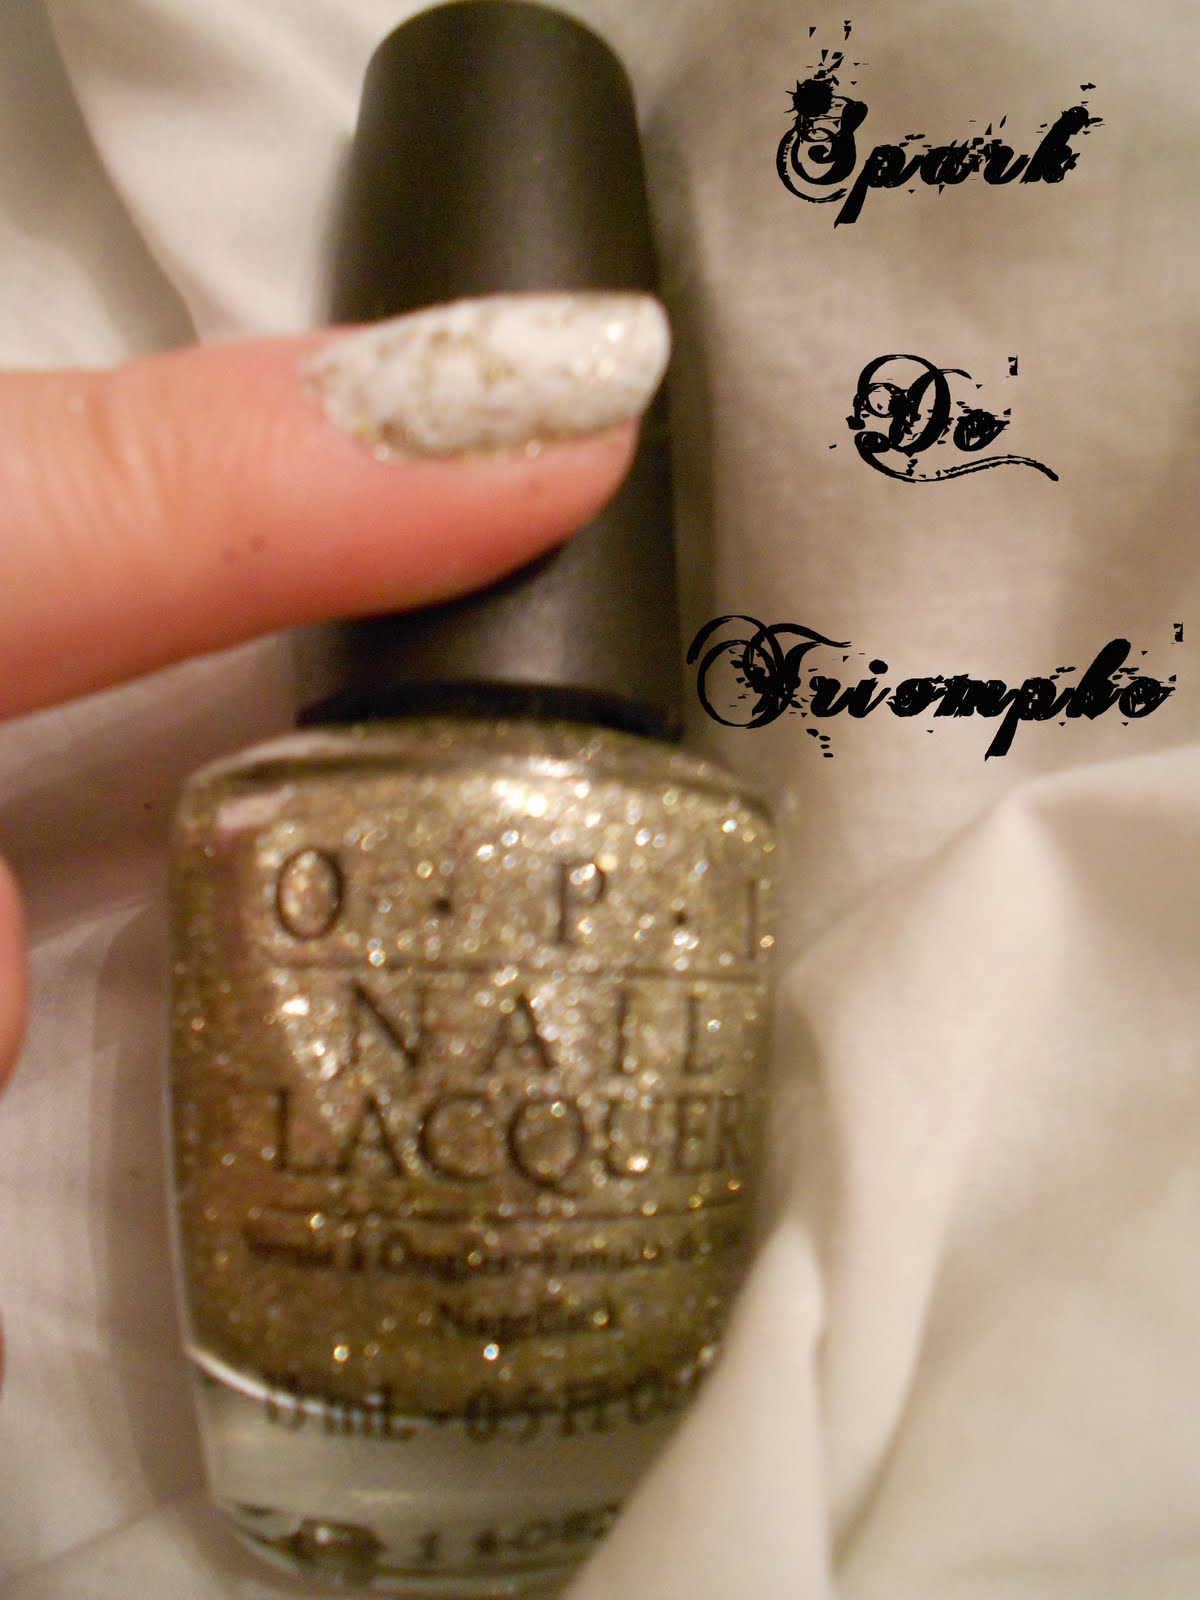
The colors that came out during the French Open in May were Spark De Triomphe with White Shatter and Rally Pretty Pink with Red Shatter. Personally, I had a very hard time finding them. I eventually found them on EBAY and had to pay 30.00 for the four of them. I really love Spark De Triomphe, which is a gold glitter. I think it can be worn by itself, but the white gives it a certain charm.


My mom and I looked high and low particularly for Rally Pretty Pink. It is a pinkish color with a gold variegation. However, when the mailman finally delivered it, we were sooooo disappointed. The color itself is SO BEAUTIFUL and it goes on great. Sadly, it looks terrible on both of us. My mother has extremely fair skin, and I have dark olive skin. The polish is nearly the color of my skin! (I'll share a little secret with you guys, Zoya's FAYE is the same exact color!!!) As for the Red Shatter, it goes on and shatters great, but in my own opinion, it looks kinda cheap. OPI suggests using the Red over Lucerne-tainly Look Marvelous (a color that looks really cool on it's own). It makes the Shatter a little darker, less red and more burgundy. I don't think it looks as cheap either. So, I suggest trying it over different colors. Real-quick-kinda-off-topic story, my mother and I have broken 3 bottles of Lucerne-tainly Look Marvelous, but it's so cool that we went out and continued to buy it again and again. ☺


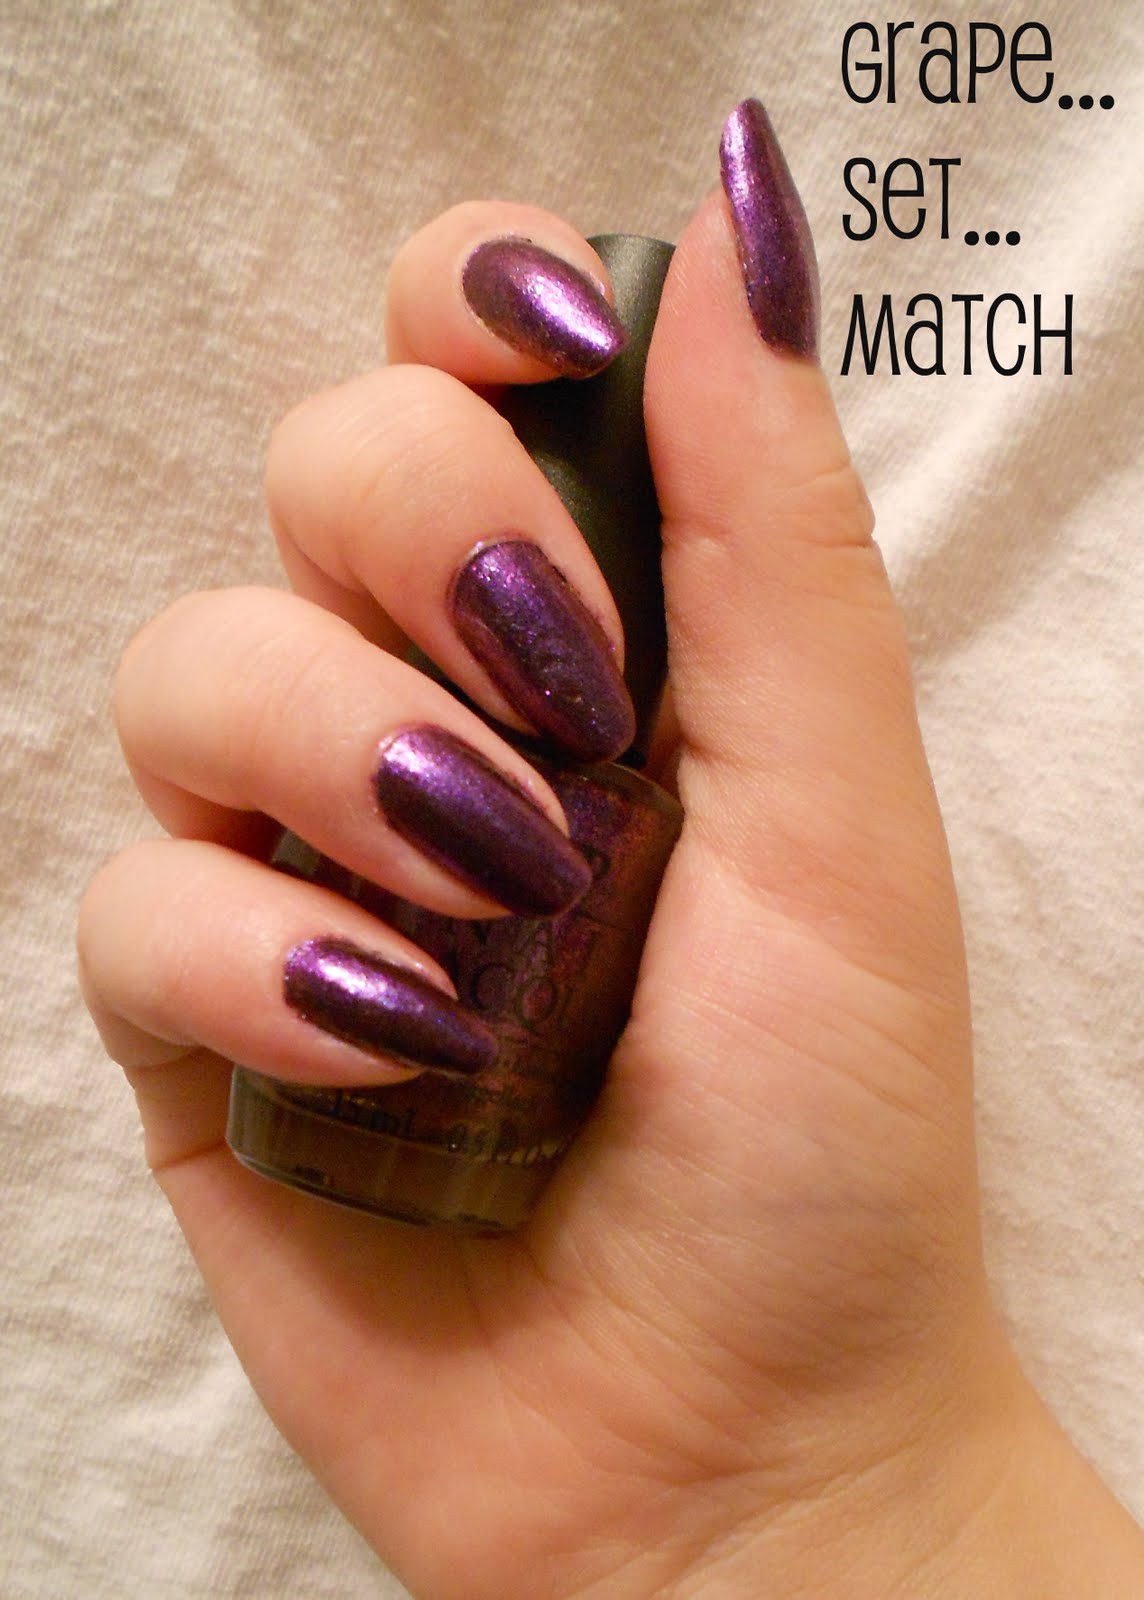
The English Open at the beggining of June brought 3 new colors Grape...Set...Match, Your Royal Shine-ness, and Servin' Up Sparkle. None of them are shatters, sadly. And at present they are in the mail on their way to my house so I can tell you guys all about them!

Peace, Love, and Nail Art!

Easy Summer Tie Dye Nail Art!

Hey Guys! I just wanted to share what I think is the easiest way to get a really cool tie dye effect on your nails without all the hassle of bowls of water and fussy drips of polish.


To get this really cool look you have to start with a white base. The white helps to really brighten the colors and make them POP. After the white has COMPLETELY dried, you can pick a few colors to create your design (I prefer something bright and not matte). I used Sally Hansen Xtreme Wear in HOT MAGENTA (pink) and in CRUSHED (orange), NYC EAST VILLAGE (blue), Sally Hansen 3D in LITE (yellow), and Maybelline Express Finish in GO GO GREEN (Green).
The only tool you need to accomplish this look is a sponge. I use a makeup sponge, but I've found that any type of sponge works and they all give you different effects. Experiment and toy with things! HAVE FUN! THERE IS NO WRONG WAY!!!
So, to start, pick a color and place a drop on a piece of paper. Then, you dip your sponge and dab it on your white nail (you may need to dab it on the paper a few times to get any extra off the sponge, otherwise it squishes everywhere and makes a total mess). You continue with all the colors you chose, dabbling them around one another and even over the edges of each other for a great blended effect.
After you've gotten the look you want, and it drys, be sure to place a top coat over it, and then...it's time to hit that pool party, Baby!!!

Milani 3D

Yesterday, I stopped off at CVS and purchased several new colors. Two of which were Milani 3D Holographic. Now, I'm not a big fan of Milani, usually they take about ten coats to get any sort of color. However, the new 3D ones gave me great coverage and they look super cool!


They actually both look holographic when you put them on! Even more to my surprise was the fact that instead of putting on 50 coats to get the color to show up, I got decent coverage with the first coat. Three coats later, they have spectacular color and a really cool look!


I totally recommend Milani 3D Holographic!

(I used 'HI-RES', which is the purple, and 'DIGITAL', which is the pink)