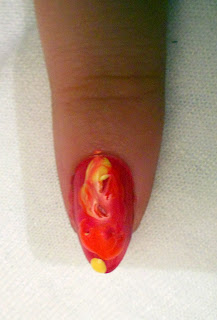
This is a pretty simple nail art tutorial. It uses a type of marbleizing technique that looks really rockin'. To start pick a couple of disco-y colors. I started by giving myself a simple manicure with one of the each of the colors I planned to use. (I alternated hot and cold colors, but you could do all pinks or all blues or all whatever.)
The second step is to place dots of coordinating colors on your nails. You want the dots to be droplets on your nails. You need to have enough polish to swirl around to cover your nail.
This is one of those times that you've gotta work kinda quick. You take a toothpick or a dotter tool (see above picture) or even an stiff paint brush. You begin to pull the droplets of polish around, swirling them together but, DO NOT MIX THEM!!!!!!!!!!!!!!!!!!!!
Continue to do this until your entire nail is covered with the swirl. It may be that you have to add a few more drops of polish here and there to be able to cover the entire nail. Just be sure to use enough variety of colors to make the nails look swirled.
It may take a few more minutes to dry entirely depending on how much polish you applied. After it drys, take a Q-Tip and some remover and clean up the edges (chances are the you'll make a mess of your fingers, but that's oke-doke).
The next step is to apply a glitter top coat to it. I'm showing you what it looks like with a softer, subtler glitter, but it looks good with larger glitter too.
After your glitter has dried you can leave the design as is or...you can continue to funk it up. I used some far-out stickers for scrapbooking to continue adding to the glam-ness. All I did was add a drop of regular top coat where I wanted the sticker and then I placed the sticker on the nail and waited for it to dry.
HEY! WHERE'S THE DISCO BALL?!!!?!!!
BURN! BABY! BURN!

The colors I used are:
Sinful Colors Fly Away (blue)
Finger Paints Chrysanthe-Mum's The Word (Green)
S.H. Xtreme Wear Mellow Yellow (yellow)
Sinful Colors Big Daddy (orange)
Borghese Raspberry Sorbetto (pink)
C.G. Boundless Color City Lights (glitter)
Thanks for viewing! PEACE OUT!
☮


No comments:
Post a Comment